Last week, I stood in a fitting room with a $168 cotton dress over one arm and a $58 version over the other. From six feet away, they looked nearly identical. Up close, the difference was obvious: one had neat seam finishes, a stable neckline, and a lining that did not twist. The other looked tired before I had even worn it. That is where garment construction basics become useful. You do not need to sew your own wardrobe or memorize industry jargon. You just need to know what your hands and eyes are telling you.
Why construction matters more than the label
A brand name, fiber label, or attractive hanger can suggest quality, but construction determines how a garment behaves after a few wears. Good construction helps a shirt keep its shape, lets a skirt hang cleanly, and reduces the chance that a seam will unravel when you reach for something on a high shelf. Poor construction often shows up as rippling, puckering, uneven hems, or a zipper that catches.
Price is not a perfect shortcut. A $240 blazer can have rushed finishing, while a $90 jacket from a smaller label can be thoughtfully made. During my years buying contemporary clothing for Nordstrom, I learned to inspect the inside first. The outside tells you the design story. The inside tells you whether the manufacturer respected the garment.
Garment construction basics also make shopping less emotional. Instead of asking whether a piece is expensive enough to be good, ask whether its details support the price. If you expect to wear a $140 cardigan 40 times, that is $3.50 per wear. If a $45 cardigan pills after four outings, the cheaper choice has not necessarily won.
Start with seams and stitching
Turn the garment inside out, either literally or by checking an accessible area near the side seam. Straight stitching is the first thing to look for. The thread should form even, regular stitches without large gaps, loose tails, or abrupt changes in direction. A little variation is normal in handmade work, but mass-produced clothing should look controlled.
Seams should lie flat rather than bunching when you gently pull the fabric. On woven garments, finished edges may use an overlock stitch, a bound seam, or a French seam. None is automatically better for every item. A French seam is especially tidy in a lightweight blouse, while an overlocked edge is practical in denim or a sweatshirt.
Check places that take stress: underarms, crotch seams, pocket openings, waistband joins, and the point where a sleeve meets the shoulder. These areas deserve reinforcement because your body moves there repeatedly. If the thread is already strained on the rack, imagine what a full day of errands will do.

Inspect hems, closures, and small details
A hem should look intentional. On a skirt or dress, hang the garment or hold it at eye level and check whether the line is even. A slightly uneven hem can change how the whole piece falls. On pants, look for enough fabric to support the hem without creating a thick, stiff ridge.
Closures reveal a lot. A zipper should move smoothly without chewing the fabric. Buttons should be securely attached, with a small amount of thread space when the fabric is thick. Buttonholes should be cleanly cut and large enough for their buttons, but not so loose that they gape. On a coat, a spare button is a welcome practical detail, not a luxury feature.
Pockets deserve a quick test, too. They should sit flat when empty and not pull the garment out of alignment when you place a phone inside. A pocket opening that collapses in the fitting room may become a permanent annoyance. This is one of the most useful garment construction basics because pockets are where design meets actual life.
Look at lining as well. A lining can help a wool skirt glide over tights, give a jacket structure, and make a dress more comfortable. It should not tug at the armholes or hang longer than the outer shell unless that is clearly part of the design. A lining that twists after one try-on is a warning sign.
Learn what fabric is doing
Fabric and construction have to cooperate. A lightweight knit may need stretch-friendly stitching and carefully stabilized necklines. A crisp cotton may need enough seam allowance and pressing to hold its shape. A fluid rayon blouse can be beautifully made, but it needs careful cutting because slippery fabric exposes uneven sewing quickly.
Use your hands. Scrunch a sleeve gently and release it. Does it recover, or does it stay creased like a receipt in a pocket? Stretch a knit across a seam, then watch whether the stitches return neatly. Hold a printed garment up to the light and check whether the pattern lines up at major seams. Perfect matching is not necessary, especially on an inexpensive casual piece, but careless mismatching can make a garment look cheaper than its price.
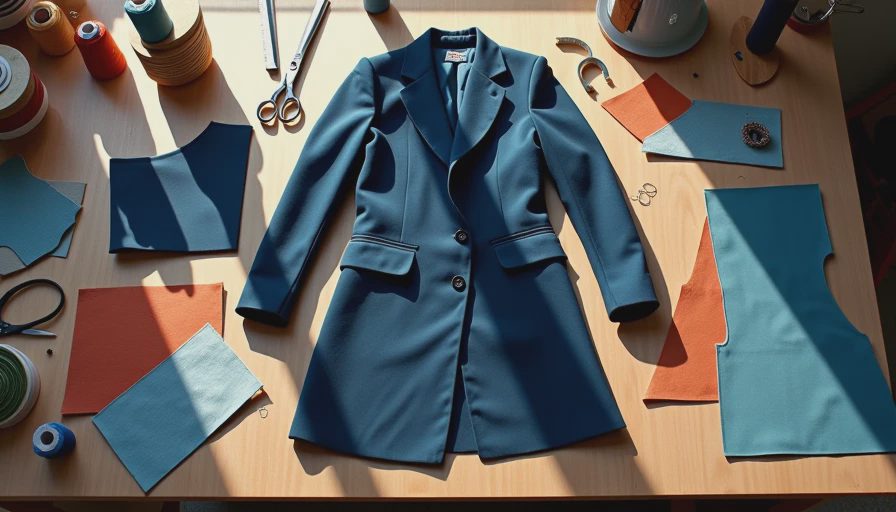
Garment construction basics are particularly helpful with denim and tailored pieces. On jeans, inspect the rise seam, belt loops, pocket corners, and zipper area. On a blazer, look at the shoulder line, lapel roll, sleeve buttons, and lining. A well-made blazer often feels balanced rather than simply heavy.
Use a five-minute fitting-room routine
You can turn these observations into a quick routine before removing the tags. First, put the garment on and move normally: sit, reach, bend, and raise your arms. Second, check whether seams remain flat while you move. Third, examine the neckline, waistband, and armholes for pulling. Fourth, open and close every closure. Finally, inspect the inside at one high-stress area.
Do not judge construction separately from comfort. A perfectly finished sweater that scratches your neck will not become a better purchase through admiration. Likewise, a simple $38 cotton shirt can earn its place if the fabric feels good, the seams stay flat, and you can imagine wearing it twice a week.
If you shop online, use product photos strategically. Zoom in on cuffs, hems, plackets, and pocket openings. Read the fiber content and care instructions, then search customer photos for evidence of stretching, twisting, or pilling. A retailer that provides close-up images and garment measurements is giving you better information than one that only shows a model walking dramatically through a beige room.
Build a sharper buying eye
The point of garment construction basics is not to turn every shopping trip into an inspection appointment. It is to give you a calmer way to decide. You do not need the most expensive version, the most intricate tailoring, or a closet full of precious pieces. You need clothing that supports the way you actually spend your days.
Start with one category you buy often. If that is denim, compare two pairs side by side. If it is knitwear, inspect the collar, shoulder seams, and recovery after stretching. Notice which details show up in pieces you wear for years. That is your personal quality vocabulary.
I still buy inexpensive clothes, especially trend-led tops and summer tanks. I simply do not ask them to perform like a wool coat or a workhorse pair of jeans. Garment construction basics help match expectations to price, fabric, and use. Spend more where longevity matters, save where experimentation is the point, and leave anything that already looks stressed on the rack. Then wear it and go.




No notes yet — write the first one.